|
|
|
Tools required
Step by Step
I began with a chaos warrior that I had previously assembled; I trimmed off his
legs where the boots met the kneepads, as shown in the picture
I then dremelled away his belt and excess torso detail, it doesn’t matter if
this is rough as it will be green stuffed over
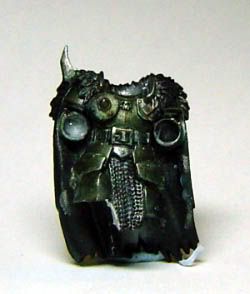
I then applied a layer of green stuff over the rough area on his chest, when
working with green stuff it is important to ensure your tool is well lubricated
I use water, but it is possible to use Vaseline, lip gloss, oil, spit, well
most wet things…. I mixed the green stuff from equal parts blue and yellow
the set it aside for 10 minutes. I smoothed the green stuff into the rough
shape then, left it for another 10 minutes and smoothed it over and tidied it
up, it ended up something like this

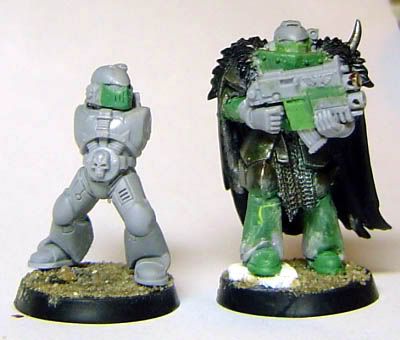
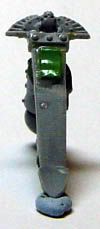
I also pinned on my power armoured legs, these were taken from a basic tactical
marine trimmed off below the knee pads, and with the feet removed. To cover the
unsightly gaps I added yet more green stuff, I made the pads slightly pointed
towards the front to stay in line with the knee pads, I added the ribbing at
the back as will be explained later in the tutorial.
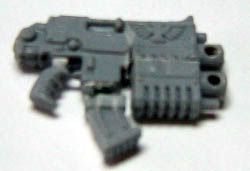
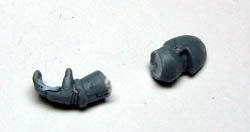
I began to make the storm bolter next I took two bolters and cut them as shown
in the picture

I then further trimmed the bottom bolter a little further for a better fit; I
also removed the magazine and pinned it back on further down, as shown in the
next diagram
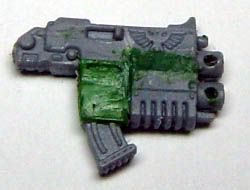
I green stuffed the gaps; this photo was taken prior to smoothing
With the bolter complete, I moved on to the arms, as the chaos warrior already
has sockets as his elbows, I used these as elbow pads I took a set of space
marine arms and cut them as shown, just below the elbow pad.
I inserted wire into the arms so as to pin them to the spare marine’s body, I
also drilled into the space marine’s elbow so as to give the pin an area to fit
in. I test fitted the arms for shape then trimmed the wire on the forearms so
as to fit properly, then I stuck the arms to the marine
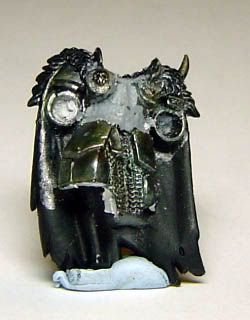
The helmet was made by trimming down the faceplate and then adding green stuff
to the gap and smoothing it so it was lush with the rest of the helmet, leaving
only holes for the eyes, I then pressed with a needle some stylised breathing
holes. To fit the helmet in the neck area requires a little dremelling of the
fur; this is mainly hidden by the helmet though.
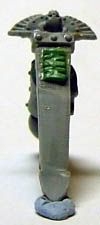
On the arms I added a layer of green stuff, not enough to fill the void, but
as a first coat, into this I cut in the ribbing, I let this set.
When the first coat was set I applied another coat, making sure not to cover
the ribbing.
I added a collar as shown in the photo above, I first made it from brown stuff
to give it a hard edge, then added a layer of green stuff and smoothed the
transition into the breast plate, the picture shows the start of an attempted
eagle, but I changed my mind and added rivets as shown below.
To add rivets I applied a ball of green stuff and flattened it to the marine’s
collar, I let this set for a minute or so, then pressed on the pencil tip
(important to be moistened first) like a biscuit cutter. This leaves an
indentation as shown; I then gently cut around the shape of the rivet which
leaves you with a perfect rivet.
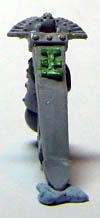
I also pinned the marine to the base and sculpted his feet on, these were done
in two halves, I sculpted the front of the foot, then in another sitting the
middle and the back together. To sculpt the foot I added a lump of green stuff,
then got it to the rough shape, let it set for about 10 minutes and then
smoothed it out. I then indented where the toe plate was, then the little rim
around the bottom of the shoe.
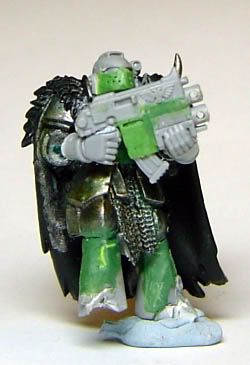
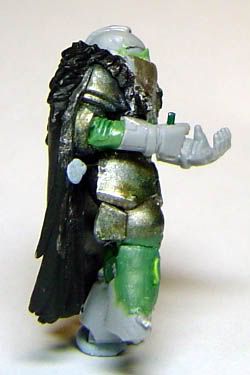
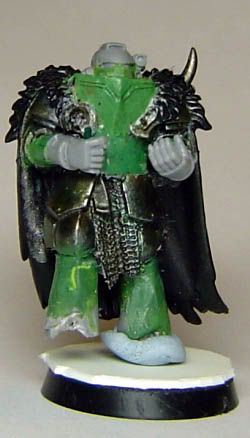
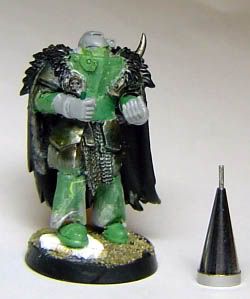
By this point the marine should look something like this (maybe better maybe
worse)
A little note on my smoothing of green stuff...
My green stuff work is definitely not that good, therefore after it has set I
go back and tidy up, I take a sharp knife and gently scrape away any lumps on
the green stuff, then take some very fine grit sand paper and gently rub in a
circular motion to smooth over the final finish.
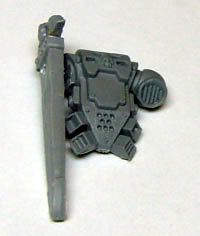
I originally untended to leave him without a backpack, but I needed somewhere
to add his nemesis force weapon, so a backpack, became necessary. So without
further ado, cut up the old chaos warrior sword in scabbard (would have used
the new style one, but I lost it …) and trimmed a vent from the backpack and
pinned it in place.
For the hilt of the sword I took the top of the space marine standard
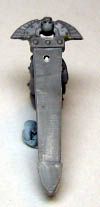
I thought the scabbard to be a little bland, so I decided to embellish it
slightly; I applied a rectangle of green stuff and smoothed it down
Next I indented into the rectangle 4 times on each side, so as to mark out
where to place the I shape
Next I trimmed away the middle segments so as it looked like=][=, I then
indented the middle segment.
Then I cut two lines into both of the middle sections of the =][=, I pinned on
a handle from one of the new chaos warriors axes, to give the sword a handle.
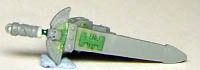
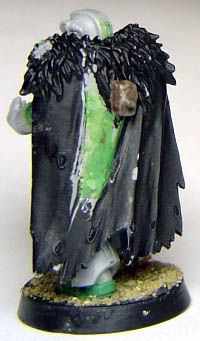
Next I added a mounting for the backpack on the cloak, also notice I removed
the skulls, this was simply me removing them a little lower than the layer of
the cloak and then smoothing it back with green stuff.
The finished model should look something like this
